https://yak919.com/ สล็อตเครดิตฟรี เว็บสล็อตหมูกรอบ แจกทุน SLOT
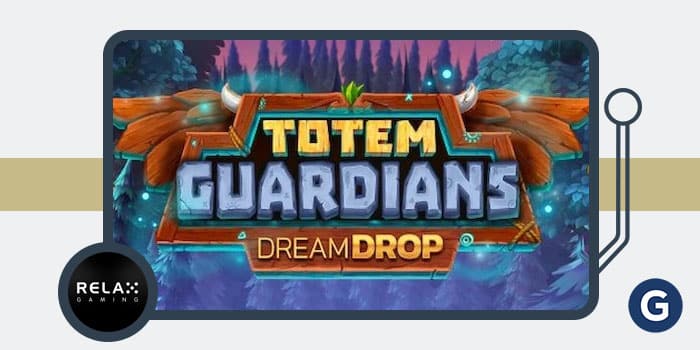
https://yak919.com/ เป็นแพลตฟอร์มออนไลน์ที่มีชื่อเสียงและเป็นมืออาชีพที่นำเสนอเกมสล็อตมากมายพร้อมเครดิตฟรี ในฐานะเว็บไซต์ชั้นนำในอุตสาหกรรมสล็อตออนไลน์ Yak919.com ภูมิใจในการมอบประสบการณ์ที่ปลอดภัยและเป็นมิตรกับผู้ใช้ให้กับผู้เล่น ด้วยเกมสล็อตที่หลากหลาย รวมทั้งธีม “หมูกรอบ” ยอดนิยม Yak919.com ทำให้มั่นใจได้ว่าผู้เล่นทุกคนสามารถค้นหาเกมที่ต้องการได้ ยิ่งกว่านั้น เว็บไซต์ยังเสนอโบนัสและโปรโมชั่นมากมาย ทำให้เป็นตัวเลือกที่น่าสนใจสำหรับทั้งผู้เล่นใหม่และผู้เล่นที่มีประสบการณ์ ด้วยการสนับสนุนลูกค้าที่เชื่อใจได้และตัวเลือกการชำระเงินที่มีประสิทธิภาพ Yak919.com จึงเป็นจุดหมายปลายทางสำหรับผู้ที่มองหาประสบการณ์สล็อตออนไลน์ที่ไม่มีใครเทียบได้ในโลกที่เปลี่ยนแปลงไปอย่างรวดเร็วในขณะนี้ การพนันออนไลน์ได้รับความนิยมเพิ่มมากขึ้นในหมู่คนทุกวัย ด้วยความสะดวกสบายและการเข้าถึงที่มีให้ ผู้คนจำนวนมากขึ้นเรื่อยๆหันมาใช้คาสิโนออนไลน์เพื่อความบันเทิงและโอกาสที่จะชนะรางวัลใหญ่ อย่างไรก็ตาม ด้วยแพลตฟอร์มการพนันออนไลน์ที่มีอยู่มากมาย การค้นหาเว็บไซต์ที่น่าไว้วางใจและมีชื่อเสียงจึงอาจเป็นเรื่องยากและท้าทาย นี่คือที่มาของ https://yak919.com/ – คาสิโนออนไลน์ชั้นนำและเชื่อใจได้ที่นำเสนอเกมที่หลากหลาย รวมถึงสล็อตแมชชีน พร้อมข้อดีเพิ่มเติมของเครดิตฟรี เป้าหมายของพวกเราที่ https://yak919.com/ คือการมอบประสบการณ์การพนันออนไลน์ที่ปลอดภัยและสนุกสนานให้กับผู้เล่นของพวกเรา ในขณะเดียวกันก็เสนอโบนัสและโปรโมชั่นที่มั่งมีด้วย ด้วยความมุ่งมั่นของพวกเราในการเล่นอย่างยุติธรรมและความพึงพอใจของลูกค้า เราได้สร้างชื่อให้กับตัวเองว่าเป็นตัวเลือกอันดับต้นๆสำหรับผู้ที่ชื่นชอบสล็อต ในบทความนี้ เราจะเจาะลึกถึงคุณสมบัติและคุณประโยชน์ของ yak919.com และเหตุใดจึงเป็นจุดหมายปลายทางสำหรับผู้ที่แสวงหาประสบการณ์สล็อตออนไลน์ที่ดีที่สุดYak919.com เป็นแพลตฟอร์มออนไลน์ชั้นนำที่นำเสนอเกมสล็อตที่น่าตื่นตาตื่นใจและมีคุณภาพสูงมากมายพร้อมเครดิตฟรี ในฐานะเว็บไซต์ชั้นนำสำหรับผู้ที่ชื่นชอบสล็อต Yak919.com ภูมิใจในการให้บริการชั้นเลิศและอินเทอร์เฟซที่เป็นมิตรต่อผู้ใช้เพื่อให้ผู้เล่นเพลิดเพลินใจไปกับประสบการณ์การเล่นเกมที่ราบรื่น ด้วยเกมสล็อตที่มีให้เลือกมากมายและโบนัสมากมาย เว็บไซต์นี้จึงเป็นจุดหมายปลายทางสำหรับผู้ที่แสวงหาความบันเทิงและชัยชนะที่อาจเกิดขึ้น ทีมงานที่อยู่เบื้องหลัง Yak919.com มุ่งมั่นที่จะมอบสภาพแวดล้อมที่ปลอดภัยสำหรับผู้ใช้ เพื่อให้มั่นใจว่าการเล่นเกมมีความยุติธรรมและการสนับสนุนลูกค้าที่รวดเร็ว เข้าร่วมชุมชนของผู้เล่นที่พึงพอใจและดื่มด่ำไปกับความตื่นเต้นของเกมสล็อตที่ Yak919.comแพลตฟอร์มออนไลน์นี้ตั้งอยู่ที่ yak919.com นำเสนอเกมสล็อตที่หลากหลายกับสิทธิประโยชน์เพิ่มเติมของโบนัสเครดิตฟรี ด้วยอินเทอร์เฟซที่ใช้งานง่ายและรูปแบบการเล่นที่น่าตื่นเต้น พวกเขามอบประสบการณ์ที่น่าเร้าใจให้กับผู้ที่ชื่นชอบสล็อตตัวยง เว็บไซต์โดดเด่นด้วยความมุ่งมั่นในการเล่นอย่างยุติธรรมและความปลอดภัย เพื่อสร้างสภาพแวดล้อมที่ปลอดภัยสำหรับผู้เล่นในการเพลินใจกับเกมโปรดของพวกเขา ยิ่งไปกว่านี้ พวกเขายังมีโปรโมชั่นและโบนัสมากมายเพื่อปรับแต่งประสบการณ์การเล่นเกมและให้โอกาสมากมายที่จะชนะรางวัลใหญ่ ไม่ว่าคุณจะยังใหม่กับสล็อตออนไลน์หรือเป็นผู้เล่นที่ชำนิชำนาญ yak919.com เป็นตัวเลือกที่มีชื่อเสียงที่ให้ทั้งความบันเทิงและโอกาสในการเพิ่มเงินรางวัลของคุณ
สล็อตเว็บตรง เปิดบริการสำหรับทั่วโลก แปลภาษาได้กว่า 380 รูปแบบ
สล็อตเว็บตรง เปิดบริการสำหรับทั่วโลก แปลภาษาได้กว่า 380 รูปแบบ เป็นเว็บไซต์ที่มีความเชี่ยวชาญในการให้บริการสล็อตออนไลน์ที่มีคุณภาพและมาตรฐานสากล โดยมีโปรแกรมแปลภาษาที่ทันสมัยและมีความแม่นยำสูง ทำให้ผู้เล่นทุกคนจากทุกประเทศสามารถเข้าถึงเกมสล็อตได้อย่างง่ายดาย สล็อตเว็บตรงมีความหลากหลายในรูปแบบของเกมที่มีให้เลือด้วยตัวเลือกภาษามากกว่า 380 ภาษา เว็บสล็อตโดยตรงที่นำเสนอโดย yak919.com ให้บริการระดับโลกที่รองรับผู้เล่นทั้งโลก แพลตฟอร์มดังกล่าวนำเสนอเกมสล็อตที่หลากหลาย และสิทธิประโยชน์เพิ่มเติมของโบนัสเครดิตฟรี อินเทอร์เฟซที่ใช้งานง่ายและรูปแบบการเล่นที่น่าตื่นตาตื่นใจมอบประสบการณ์ที่น่าตื่นตาตื่นใจสำหรับผู้ที่ชื่นชอบสล็อต เว็บไซต์มีความโดดเด่นในด้านความมุ่งมั่นในการเล่นอย่างยุติธรรมและความปลอดภัย โดยสร้างสภาพแวดล้อมที่ปลอดภัยสำหรับผู้เล่นในการเพลิดเพลินเจริญใจกับเกมโปรดของพวกเขา ยิ่งกว่านั้น yak919.com ยังมีโปรโมชั่นและโบนัสมากมายเพื่อยกระดับประสบการณ์การเล่นเกมและให้โอกาสมากมายในการชนะรางวัลใหญ่ ไม่ว่าคุณจะยังใหม่กับสล็อตออนไลน์หรือเป็นผู้เล่นที่เก่ง yak919.com เป็นตัวเลือกที่มีชื่อเสียงที่ให้ทั้งความบันเทิงและโอกาสในการเพิ่มเงินรางวัลของคุณ
สล็อตเว็บตรงโหมดการเดิมพันเติมเต็มความสนุกที่มากกว่า
สล็อตเว็บตรงโหมดการเดิมพันเติมเต็มความสนุกที่มากกว่าเป็นแพลตฟอร์มการเดิมพันออนไลน์ที่มีการพัฒนาอย่างสม่ำเสมอเพื่อให้ผู้เล่นได้สัมผัสประสบการณ์การเล่นสล็อตที่ยอดเยี่ยมและให้ความสนุกสนานมากเพิ่มขึ้น โดยมีการเปิดให้บริการอย่างต่อเนื่อง 24 ชั่วโมงตลอด 7 วัน และมีความเหมาะสมกับการเล่นที่หลากหลาย ไม่ว่าจะเป็นเกมสล็อตที่มีเครื่องหมายหสล็อตเว็บตรงโหมดการเดิมพันเติมเต็มความสนุกที่มากกว่านำเสนอประสบการณ์ที่ดื่มด่ำและน่าตื่นตาตื่นใจอย่างแท้จริงสำหรับผู้ที่ชื่นชอบสล็อต ด้วยเกมสล็อตที่หลากหลาย ผู้เล่นสามารถเพลิดเพลินใจกับธีมและสไตล์การเล่นที่มีให้เลือกมากมาย แพลตฟอร์มดังกล่าวได้รับการออกแบบด้วยอินเทอร์เฟซที่ใช้งานง่าย ช่วยทำให้การนำทางที่ราบรื่นและการเล่นเกมที่ไม่ยุ่งยาก นอกเหนือจากนี้ เว็บไซต์ยังให้ความสำคัญกับการเล่นอย่างยุติธรรมและความปลอดภัย เพื่อให้มั่นใจว่าผู้เล่นจะได้ดื่มด่ำกับเกมโปรดในสภาพแวดล้อมที่ปลอดภัย นอกนั้น ช่องตรงของระบบเติมเต็มความสนุกที่มากกว่านั้นยังมีโปรโมชั่นและโบนัสมากมาย ยกระดับประสบการณ์การเล่นเกมโดยรวมและให้โอกาสมากมายสำหรับผู้เล่นที่จะชนะรางวัลใหญ่ ไม่ว่าคุณจะยังใหม่กับสล็อตออนไลน์หรือผู้เล่นที่ชำนาญ ช่องเว็บตรงของระบบเติมเต็มความสนุกที่มากกว่าคือตัวเลือกที่มีชื่อเสียงที่ให้ทั้งความบันเทิงและโอกาสในการเพิ่มเงินรางวัลของคุณ โดยสรุปด้วยวิธีการดังกล่าวที่ใช้ งานง่ายโบนัสมากมายและเกมมากมาย https://yak919.com/มอบประสบการณ์การเล่นเกมที่ยอดเยี่ยมสำหรับผู้เล่นทุกคน การอุทิศตนของแพลตฟอร์มเพื่อความพึงพอใจของลูกค้าและความมุ่งมั่นในการพนันอย่างมีความรับผิดชอบ ทำให้แพลตฟอร์มนี้เป็นตัวเลือกที่มีชื่อเสียงอย่างมากสำหรับผู้ที่ชื่นชอบสล็อตออนไลน์ ไม่ว่าคุณจะเป็นผู้เล่นที่มีประสบการณ์หรือเพิ่งจะเริ่ม yak919.com เป็นสิ่งที่ต้องลองสำหรับผู้ชื่นชอบสล็อตทุกคน แล้วจะรอทำไม? ลงทะเบียนตอนนี้และเริ่มหมุนวงล้อพวกนั้นเพื่อรับรางวัลใหญ่!